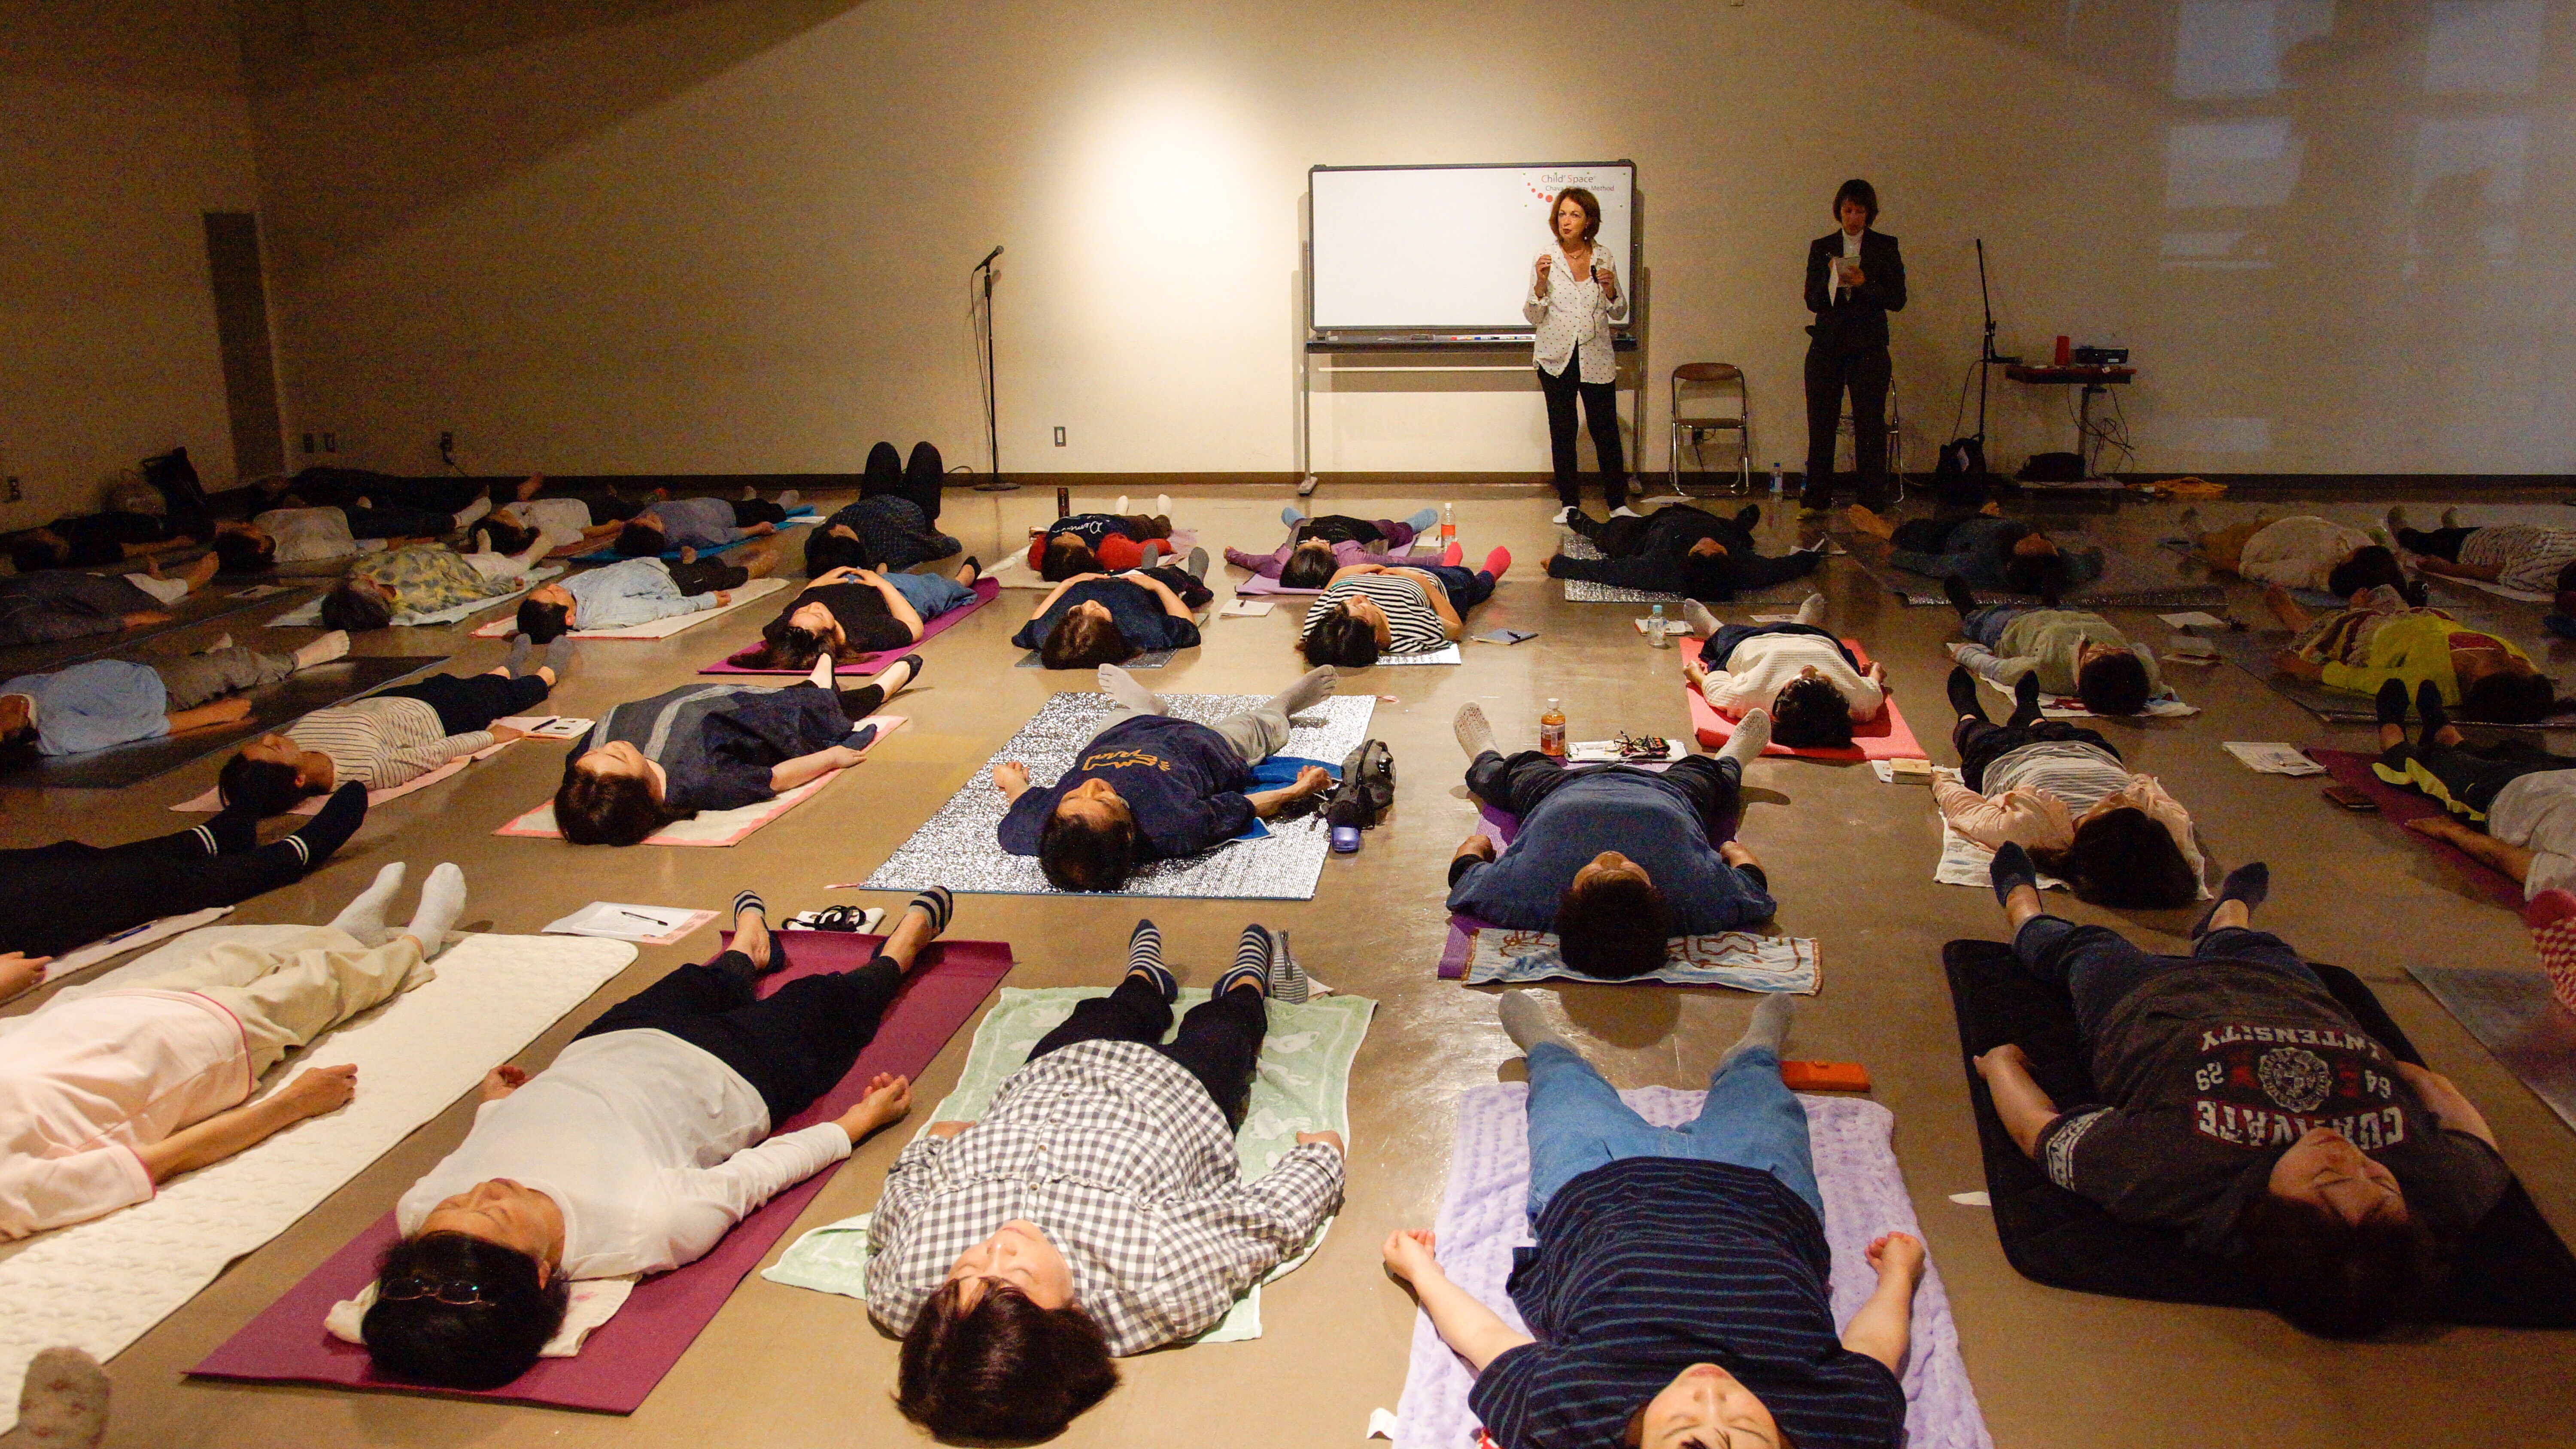
Three short online lessons based on the Feldenkrais method as published in the Israeli press
These lessons are carefully crafted sequences of movements that focus your awareness on how you organize movement. The lessons are not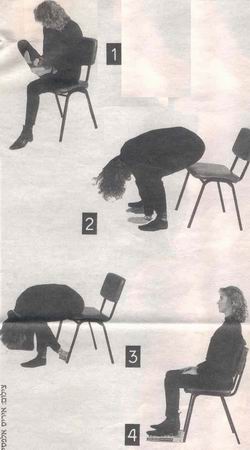 physical exercises in the usual sense. More accurately, they should be considered mental exercises for the body. Improving the quality of movement is the goal. Effort and pain counter-productive and reduce the benefits of these the lessons. Read the following guidelines before doing the lessons.
1. Repeat each movement slowly and don’t strain.
Take the time to feel your movements. If you run from point A to point B you can’t see much on the way, but if you stroll you become aware of many things. Resist the temptation to strain. Search for ways to make the movements easier, lighter, and more enjoyable. Work only within your comfort zone. Notice if you are breathing steadily and easily during the movement.
2. Observe differences.
Before going on to the next instruction take some time to rest and observe any new sensations. After each lesson, take some time to stand and then walk around a bit, observing new sensations. These moments of observation help your nervous system integrate what it has learned.
Caution:
You should experience no pain or discomfort when doing the lessons. These lessons are not a substitute for professional medical advice.
Sitting correctly is not always easy
Sitting is an activity that we usually do not give much thought to, it is fairly automatic. Our sitting habits do not always serve us properly and some of those habits even disrupt proper sitting and cause us pain. Our instinct for what is natural or comfortable has been lost and, in today’s culture, we look for models that dictate to us what is right or wrong. People usually expect some instruction in how to sit correctly.
The illustrations show a series of movements that encourage more comfortable sitting. It is not based on some ideal of sitting, but helps you discover how to sit comfortably.
Try these movements and then check in with yourself, observing differences:
Am I really sitting more comfortably?
Is it easier to sit?
Do I feel freer?
The movements
1. Sit on the front edge of your chair so that both feet are flat on the floor. Place your right foot on your left knee. Slide both hands under your right calf.
a) Now lift your calf in the direction of your head. Simultaneously lower your head in the direction of your calf. Make sure that your left foot does not leave the floor.
Important: This movement encourages movement in the spine and hip joints. DO NOT strain.
Repeat the movement a number of times. Pay attention that you breathe steadily throughout the movement. Notice when you inhale and when exhale, during the movement. After a number of repetitions, return your right foot to the floor and compare the feeling in your right leg and your left leg.
b) Repeat this movement on the other side, resting the left foot on right knee.
2. Sit on the front edge of your chair so that both feet are flat on the floor.
a) Bend forward and see how far your arms can reach under your chair. Repeat a number of times. Allow your breathing to be soft and 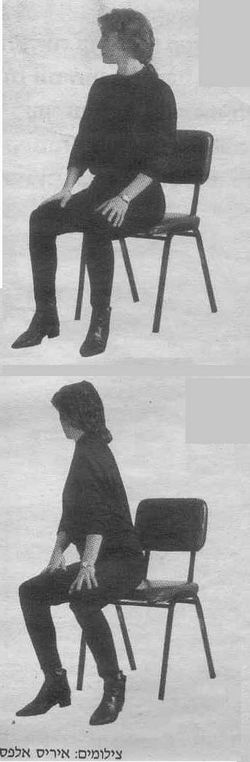 steady. Reduce effort as much as possible. Use gravity and not muscular effort to let your body hang down.
3. Sit on the front edge of your chair with your legs comfortably spread and both feet are flat on the floor. Bend forward and place both hands flat on the floor. Your fingers and palms should be in contact with the floor.
a) Let your head go down and, at the same time, raise your pelvis off the chair pan. Note: Do not raise your pelvis high in the air. Raising your pelvis just enough to slip a piece of paper under your buttocks is sufficient. Repeat a number of times.
4. Repeat all 3 movements and observe if the movement has become easier.
5. Sit with your pelvis close to the back of your chair. Create a comfortable environment for yourself by placing, if necessary, a book or something firm under your feet so that your feet can rest flat on a surface and, if necessary place a pillow behind your back. You must experiment to find the most comfortable configuration for you. Close your eyes and just sit quietly. Observe how you are sitting. Pay attention to the details. Close attention to the details allows you to learn what comfortable sitting means.
Try to adapt the exercises shown here to sitting at the dinner table, at your computer, in the car, and any other situations where you find yourself in a sitting position.
Try to adapt your environment also for more comfortable sitting:
The height of the table
The distance from the floor to your seat
The location of your keyboard
Walking backwards to improve walking
Practice in walking backwards improves spatial orientation and balance. This exercise is suitable for adults and children. It is also fun. The park, the beach, or home is a comfortable and protected environment for walking backwards. When you gain confidence, you can try running backwards or going up slopes backwards.
The movement
Walk a few steps forwards and then walk six or seven steps backwards. When you gain confidence you can walk a few more steps backwards each time. Always walk forwards before walking backwards as walking backwards is not the goal but the means to improved your walking.
Benefits
Using different muscles
Sets of muscles, especially the thigh muscles, are involved in backward walking at a different level of muscle tone and synchronization than when walking forward.
Changing habitual movement patterns
Changing the direction of walking creates a novel stimulus that is perceived by the brain and is passed on to the skeleton and muscles. Breathing is also affected by the new orientation. Walking backward can prevent or minimize problems in the knees and hip joints. While walking backwards the body’s weight travels from the toes to the heels, instead of from the heels to the toes as it does when you walk forward. This is also beneficial to the ankles. Walking forward, the ankle is less involved, while walking backward requires bending and straightening the ankle. This, in turn, causes a chain reaction that positively affects posture and ease of movement and flexibility in the ankle, the knee, and the hip joints. Often, following an injury, the ankle forgets its flexibility and the resulting static movement creates unnecessary stress.
Improving spatial orientation
In addition to strengthening muscles, walking backward improves motor organization simply by requiring heightened spatial awareness. This is particularly important to older people, as spatial orientation and balance are the first functions that suffer disruption.
Relieving pain
Walking backward relieves problems of the lower back and slipped disks because the heel must touch the ground. When the heel is forced to touch the ground, less pressure is transferred to the vertebrae.
Influencing bone density
The transfer of weight from the toes to the heels stimulates the bones in the calf, the thigh, and the lumbar vertebrae. Stimulating the bones encourages higher bone density.
Children
Walking backwards benefits children suffering from motor problems and impaired balance. I recommend teaching backward walking to children starting from 2 years of age. When teaching young children to walk backwards it is advisable to hold their hand until they develop enough confidence to walk backward independently. Do not chalk a straight line on the floor for the child to follow. This requires an exactitude that creates unnecessary stress. The accent should be on co-ordination and spatial orientation.
Improving normal walking
Walking backward makes walking forwards at least twice as easy than before. Combining forward and backward walking reduces stress in muscles that are used to working unnecessarily hard when walking forward. When you return to walking forward only, you may find your walking more energetic, faster, and using bigger steps.
How to turn around without straining your back muscles
The theory
The Feldenkrais method supposes that all actions consist of movement, sensation and thought. In the course of a person’s life disruptions in daily functioning develop. Disruptions result from improper use of the body or improper ways of thinking, which are actually an inseparable whole, and these disruptions imprint behavior patterns. These behavior patterns eventually influence both the mind and the body and cause pain and discomfort. Practicing the Feldenkrais Method of self re-education, it is possible to restore movement function to its optimal state.
Dr. Feldenkrais researched the biomechanical laws whereby the body operates in the field of gravity. He intuited the connection between biomechanical laws and human evolution and the influence of hereditary, social, education, and cultural factors on human movement.
The Feldenkrais Method has gained international recognition and, for many years, has been taught by specially trained teachers.
Many of us have had the misfortune of turning around to look behind and experiencing sudden pain or throwing our back out. This is caused by inefficient use of the body. Over time, using the body inefficiently may cause discomfort and pain. A change in thinking about how we act will lead us to improve movement and functioning. If we check how we turn to look back, we find that this movement includes muscle work, skeletal work, and nervous system organization.
All movement requires some kind of stimulus. Turn to look over your shoulder and pay attention to how you turn. Are only your eyes and head involved? Or do other areas of the body and systems participate in this movement? To improve the movement we must learn to discern what takes part in the movement. The exercise’s goal is to help you discern which parts of the body participate in turning to look back and to see how this understanding helps improve the movement and make it more efficient.
The movements
1. Sit comfortably on a chair or on the floor.
a) Turn to the right and look back. Mentally mark a point on the wall that you can easily see. Remember this point; we will check it again at the end of the lesson.
b) Place your hands comfortably on your knees and take both shoulders to the left and back to the center a number of times.
c) Continue taking your shoulders to the left and, at the same time, turn your head to the right. Your head moves in the opposite direction of your shoulders
Remember! Do all movements easily without strain. Do not go past your comfort zone.
d) Take your shoulders and head to the right a few times.
e) Stay turned to the right and let only your eyes return gently to the left and back to the right a number of times, separating the eyes from the movement pattern of turning. Breaking the movement pattern by moving the eyes in the opposite direction, allows your system to reconstruct an improved movement pattern. Return everything (eyes, head, and shoulders) to the center.
f) Continue turning your eyes, head, and shoulders to the right and add lifting the left side of your pelvis. Do this a number of times. Keep your heels on the floor.
g) Turn to your right and find the point you mentally marked at the beginning of the lesson. Check if you can easily turn past this point.
h) Repeat all the steps on the other side.
Adopt what you learned in this lesson, using your whole body when turning to look behind, for more pleasurable daily functioning. You will find that, at first, you must be conscious of your movement and actions, but eventually the improved movement becomes spontaneous.